Three.js
THREE.JS - SCENE & RENDERER
Basic functionality of a Scene
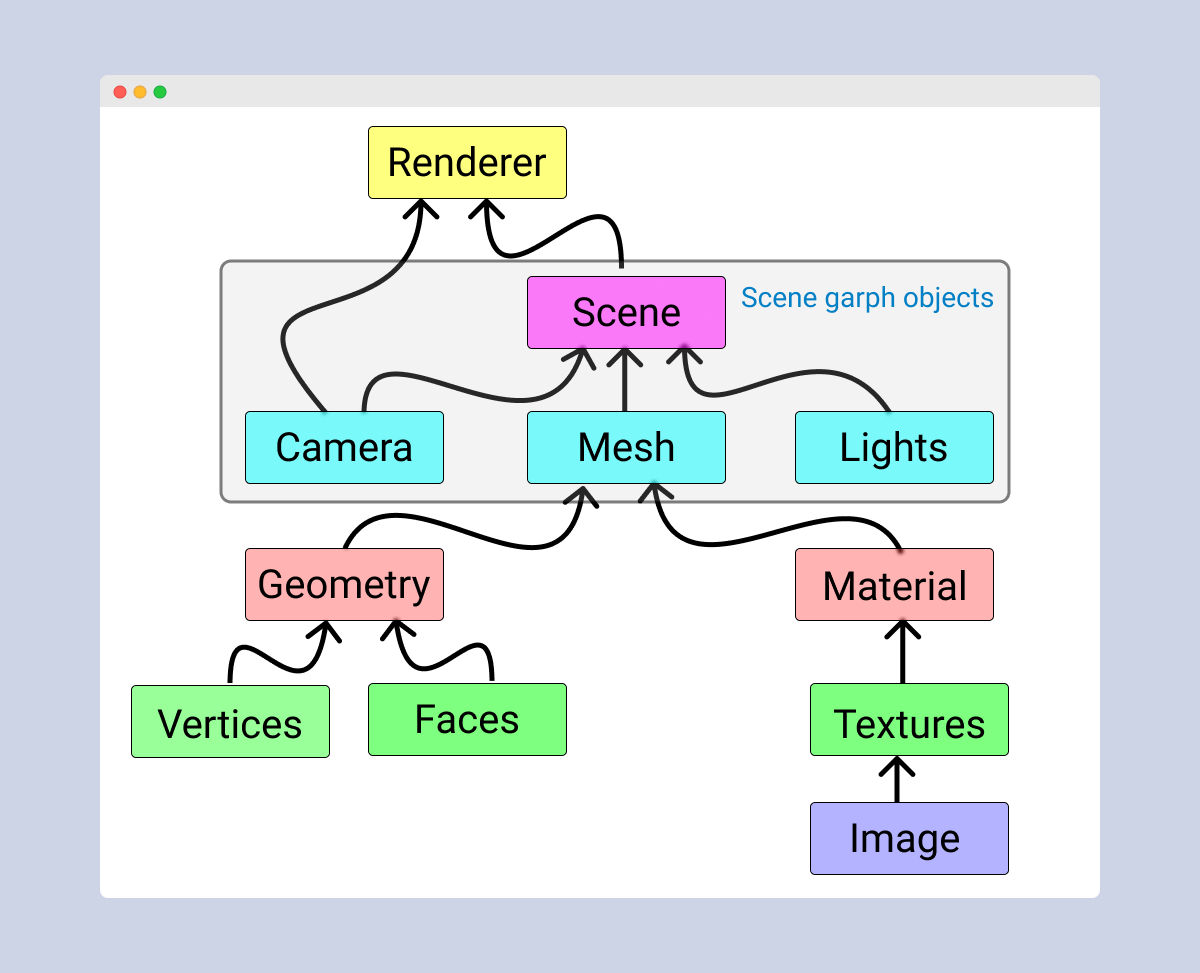
You know that Scene is a container for the camera, lights, and objects we want to render on the screen. Let’s look at some basic functionality of the Scene object:
Adding an object
The function add(object) is used to an object to the scene.
const scene = THREE.Scene()
scene.add(cube) // adds the cube
scene.add(sphere) // adds a sphere
Removing an object
The function remove(object) removes an object from the scene.
scene.remove(cube) // removes the last added cube
scene.remove(sphere) // removes a sphere
Children
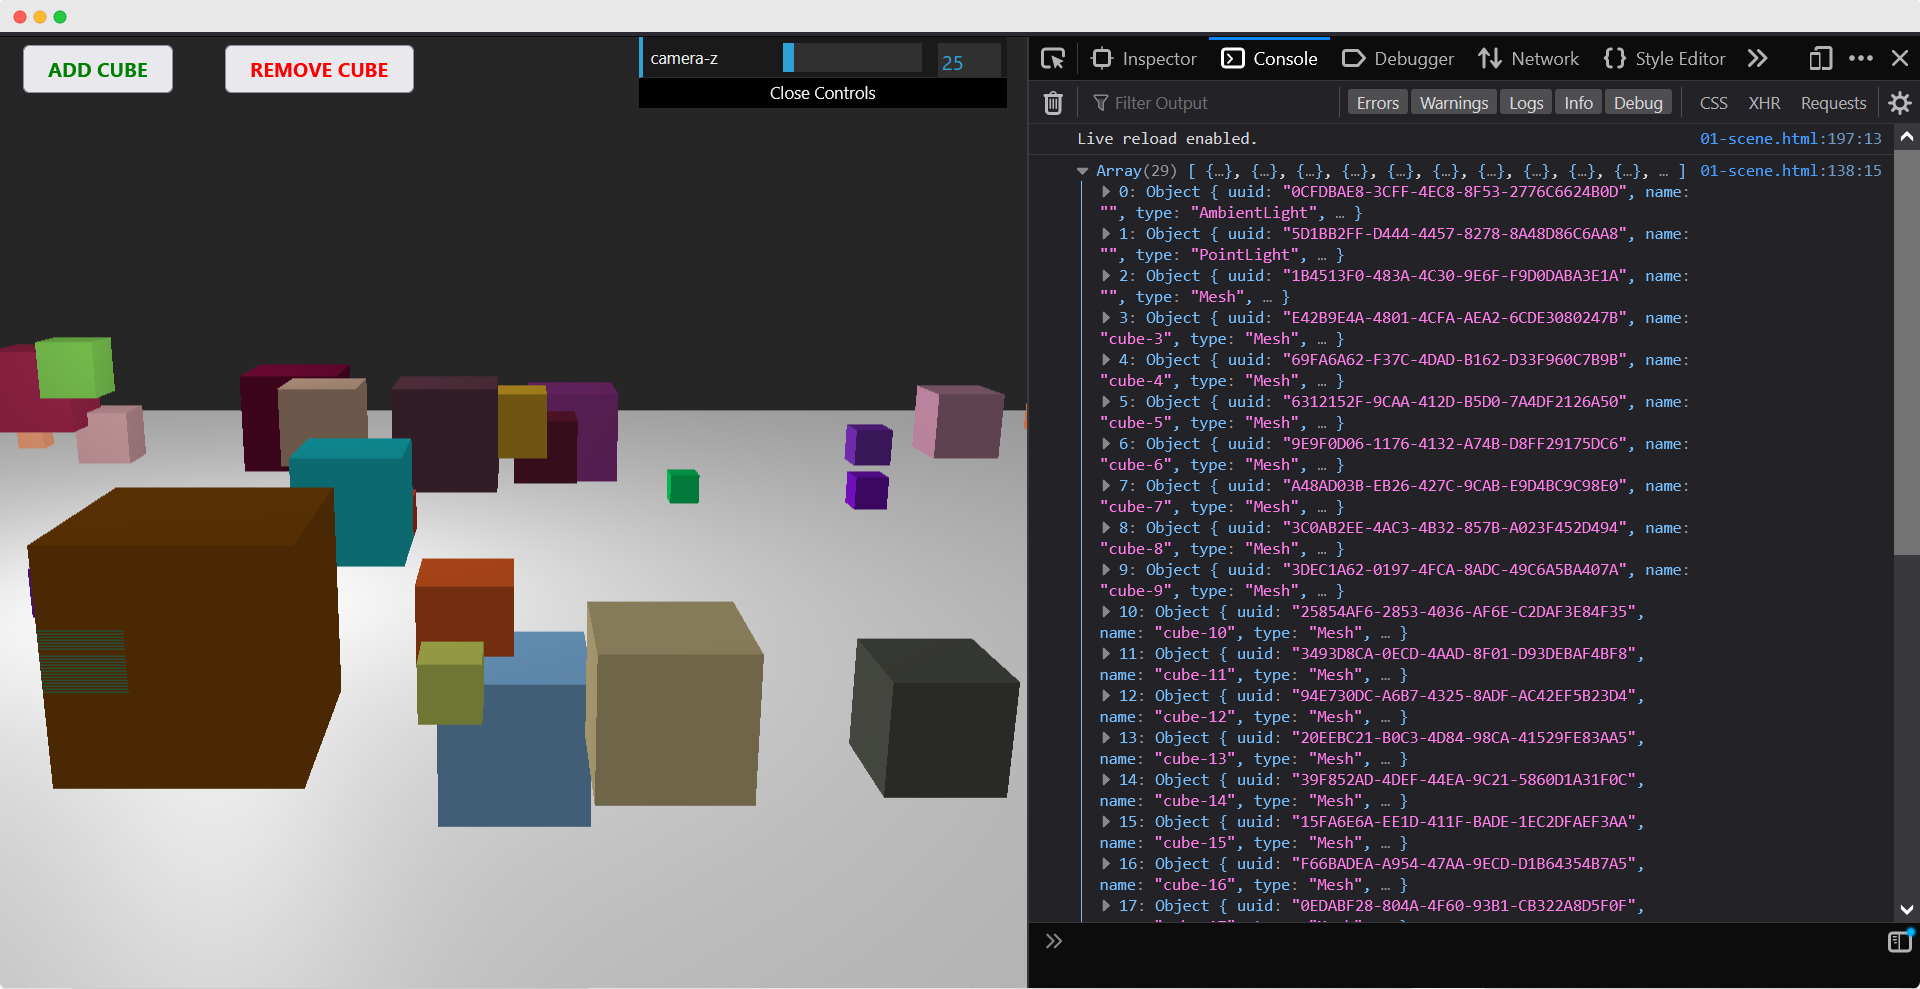
In the scene.children return an array of all the objects in the scene including the camera and lights.
console.log(scene.children) // outputs all the objects in the scene
console.log(scene.children.length) // outputs number of elements on the scene
Note: we can give a name to any object using its
nameattribute. A name is very useful for debugging purposes but can also be used to directly access an object from your scene.
Check out this example. Check the console to see the object in the scene.
Using name attribute
The function scene.getObjectByName(name) directly returns the object, by specific name, from the scene.
You can also add another argument - recursive.
scene.getObjectByName(name, recursive)
If you set the recursive argument to true, Three.js will also search through the complete tree of objects to find the object with the specified name.
Adding Fog to the scene
This property allows you to set the fog for the scene. The fog will render a haze that hides faraway objects.
scene.fog = new THREE.Fog(0xffffff, 0.015, 100)
This line of code defines a white fog (0xffffff). The preceding two properties can be used to tune how the mist appears. The 0.015 value sets the near property, and
the 100 value sets the far property. With these properties, you can determine where the mist starts and how fast it gets denser.
With the THREE.Fog object, the fog increases linearly. There is also a different way to set the mist for the scene; for this, use the following definition:
scene.fog = new THREE.FogExp2(0xffffff, 0.01)
This time, we don’t specify near and far, but just the color (0xffffff) and the mist’s density (0.01). It’s best to experiment a bit with these properties to get the effect you want.
Using the overrideMaterial property
The overrideMaterial property will force all the objects in the scene to use the same material.
scene.overrideMaterial = new THREE.MeshLambertMaterial({ color: 0xffffff })
Here, all the objects on the scene will be of the same material i.e., MeshLambertMaterial.
Note:
THREE.Sceneis a structure that is sometimes also called a Scenegraph. A scene graph is a structure that can hold all the necessary information of a graphical scene. In Three.js, this means thatTHREE.Scenecontains all the objects, lights, and other objects necessary for rendering.
Renderer
The renderer uses the camera and the information from the scene to draw the output on the screen i.e, <canvas> element.
In the Hello cube app, we used the WebGLRenderer. There are some other renderers available, but the WebGLRenderer is by far the most powerful renderer available, and usually, the only one you need.
Note: There is a canvas-based renderer, a CSS-based renderer, and an SVG-based one. Even though they work and can render simple scenes, I wouldn’t recommend using them. They’re not actively developed anymore, very CPU-intensive, and lack features such as good material support and shadows.